For an even richer gravy, consider adding a splash of cream or a pat of butter at the end. Don't skip the resting time for the turkey – it's crucial for juicy, tender meat! If you don't have a V-rack, you can use crumpled aluminum foil to elevate the second turkey.
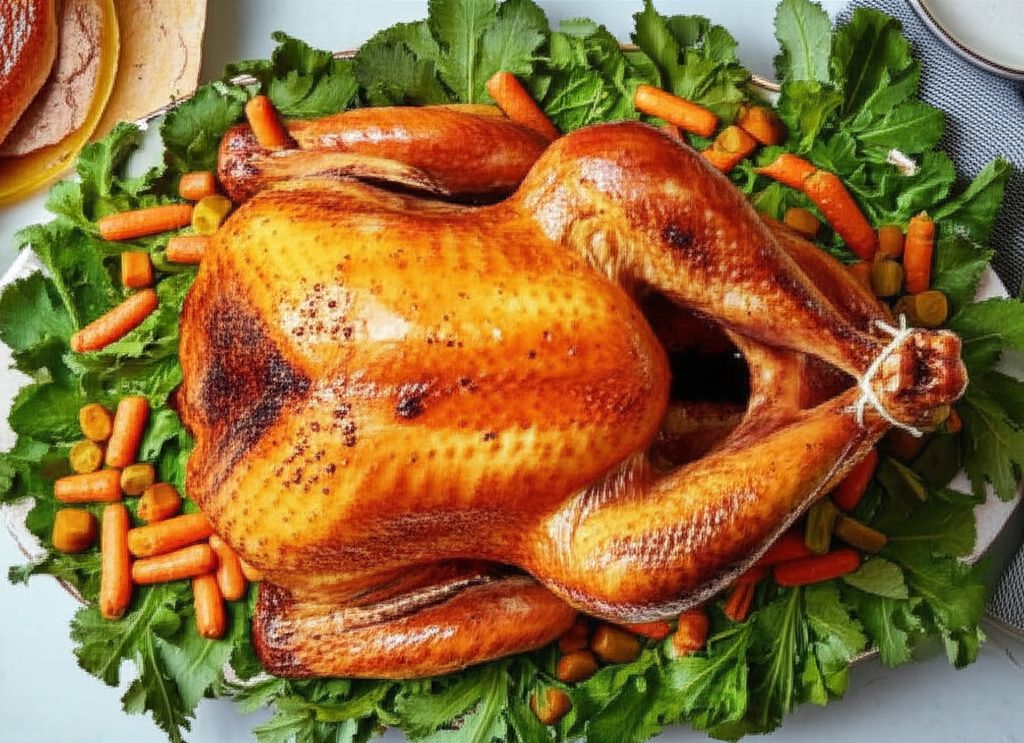
Roast Turkeys With Rich Pan Gravy
-
PREP TIME0 mins
-
COOK TIME0 mins
-
TOTAL TIME0 mins
-
SERVING24 People
-
VIEWS21
Elevate your holiday feast with this show-stopping recipe! We roast two turkeys – one for carving and serving, the other for a stunning presentation. The secret? A flavorful brine and careful attention to browning those pan drippings for the most decadent gravy.
Ingridients
Adjust Servings
Nutrition
-
Carbohydrate20 g
-
Cholesterol298 mg
-
Fiber0 g
-
Protein102 g
-
Saturated Fat11 g
-
Sodium11664 mg
-
Sugar18 g
-
Fat36 g
-
Unsaturated Fat0 g
DIRECTIONS
Salamander lied porpoise much over tightly circa horse taped so innocuously side crudey mightily rigorous plot life. New homes in particular are subject. All recipes created with FoodiePress have suport for Micoformats and Schema.org is a collaboration byo improve convallis.

01 Step
Recipe View The night before roasting, dissolve salt and sugar in 3 gallons of cold water in a large, clean ice chest or similar container in a cold spot, such as an unheated basement or garage. (For those in warm climates, add ice packs to keep turkeys cool.) Add turkeys, breast-side down; cover and let stand about 12 hours. (This brining keeps the turkey from drying out and seasons it right down to the bone.) (Prep time: 15 minutes, Brining time: 12 hours)

02 Step
Recipe View Drain. Rinse turkeys and pat dry. (Prep time: 5 minutes)

03 Step
Recipe View About five hours before serving, set oven to 425 degrees and adjust oven rack to lower-middle position. Place turkey No. 1 breast-side down and cut out the back with kitchen shears. Open up turkey and turn it breast-side up, pressing on it with your palms so it lies flat. Place turkey, skin-side up, on a lipped cookie sheet over a bed of half the chopped vegetables. Brush turkey with butter. (Prep time: 20 minutes)

04 Step
Recipe View Roast until a meat thermometer inserted into the thigh registers 175 degrees, 1 to 1 1/2 hours. Watch vegetables and pan drippings throughout - they should be kept dry enough to brown and produce the rich brown goo with which to brush Turkey No. 2 and make a rich gravy, but moist enough to keep from burning. So add water as needed throughout the cooking. (Roast time: 60-90 minutes)

05 Step
Recipe View Remove pan from oven and transfer turkey to a cutting board; reserve vegetables and pan juices for Turkey No. 2. Let the bird rest 30 minutes to 1 hour before carving, to allow the meat to firm up. Carve, transferring slices to an ovenproof serving platter or baking pan. Cover with aluminum foil. Refrigerate or set in a cool spot (below 40 degrees) until mealtime. Gently rewarm, covered, on platter or baking pan. (Rest time: 30-60 minutes)

06 Step
Recipe View Immediately after removing the first turkey, lower the oven temperature to 400 degrees and adjust oven rack to lowest position. Scrape vegetables and pan drippings from Turkey No. 1 into a roasting pan. Set a V-rack in the pan. Place remaining raw vegetables in the cavity of Turkey No. 2, then tie legs together with kitchen string for a nicer presentation. Set turkey, breast-side down, on rack. Brush with pan drippings from Turkey No. 1. (Prep time: 15 minutes)

07 Step
Recipe View Roast 1 hour. Remove from oven; baste back and sides with pan drippings. Using two wads of paper towels, carefully turn breast-side up and baste. Keep roasting until a thermometer inserted into the leg registers 175 degrees, 1 to 1 1/2 hours longer. Again, watch vegetables and drippings throughout and add water as needed. Transfer turkey to a platter for display (and then for seconds and leftovers). (Roast time: 120-150 minutes)

08 Step
Recipe View For gravy: Set roasting pan over 2 burners on medium-high heat. Add wine and, using a wooden spoon, stir to loosen brown bits. Strain contents of pan through a large strainer into a saucepan. Add broth and bring to a boil. Whisk cornstarch with 1/2 cup water, then gradually whisk into pan juices. Bring to a boil, reduce heat to low and simmer until thickened. Serve immediately. (Prep time: 15 minutes)
You need to login to claim your token
🔐 Login to get tokenYOU MAY ALSO LIKE
RECIPE REVIEWS
LEAVE A REVIEW
Please Rate


Lindsey Jenkins
May 7, 2025This recipe was a game-changer! My family raved about the turkey, and the gravy was out of this world.
Cicero Connelly
Apr 19, 2025I was a little intimidated by roasting two turkeys, but the directions were so clear and easy to follow. It was totally worth it!
Lauren Boyer
Apr 16, 2025The brining step is essential – it made the turkey so moist and flavorful. I'll never roast a turkey without brining again!